Guide · 11 steps
Find a suppressor
Narrow the whole catalog to a short list by stacking real requirements. We follow one shopper's goal, a 9mm suppressor under $700 that's independently sound-tested and under 8 inches, using filters, search, and sorting.
Open the suppressor catalogStep 1: Open the catalog
Open Suppressors from the top navigation. The count above the results always shows how many you're viewing against the total. The page draws a screenful at a time and loads the rest as you go, so the search box stays greyed out for the moment it takes the whole catalog to arrive: a box that searched only what was on screen would report no match for suppressors we carry. Our shopper is after a compact, affordable, well-tested 9mm suppressor, so let's build that up filter by filter.
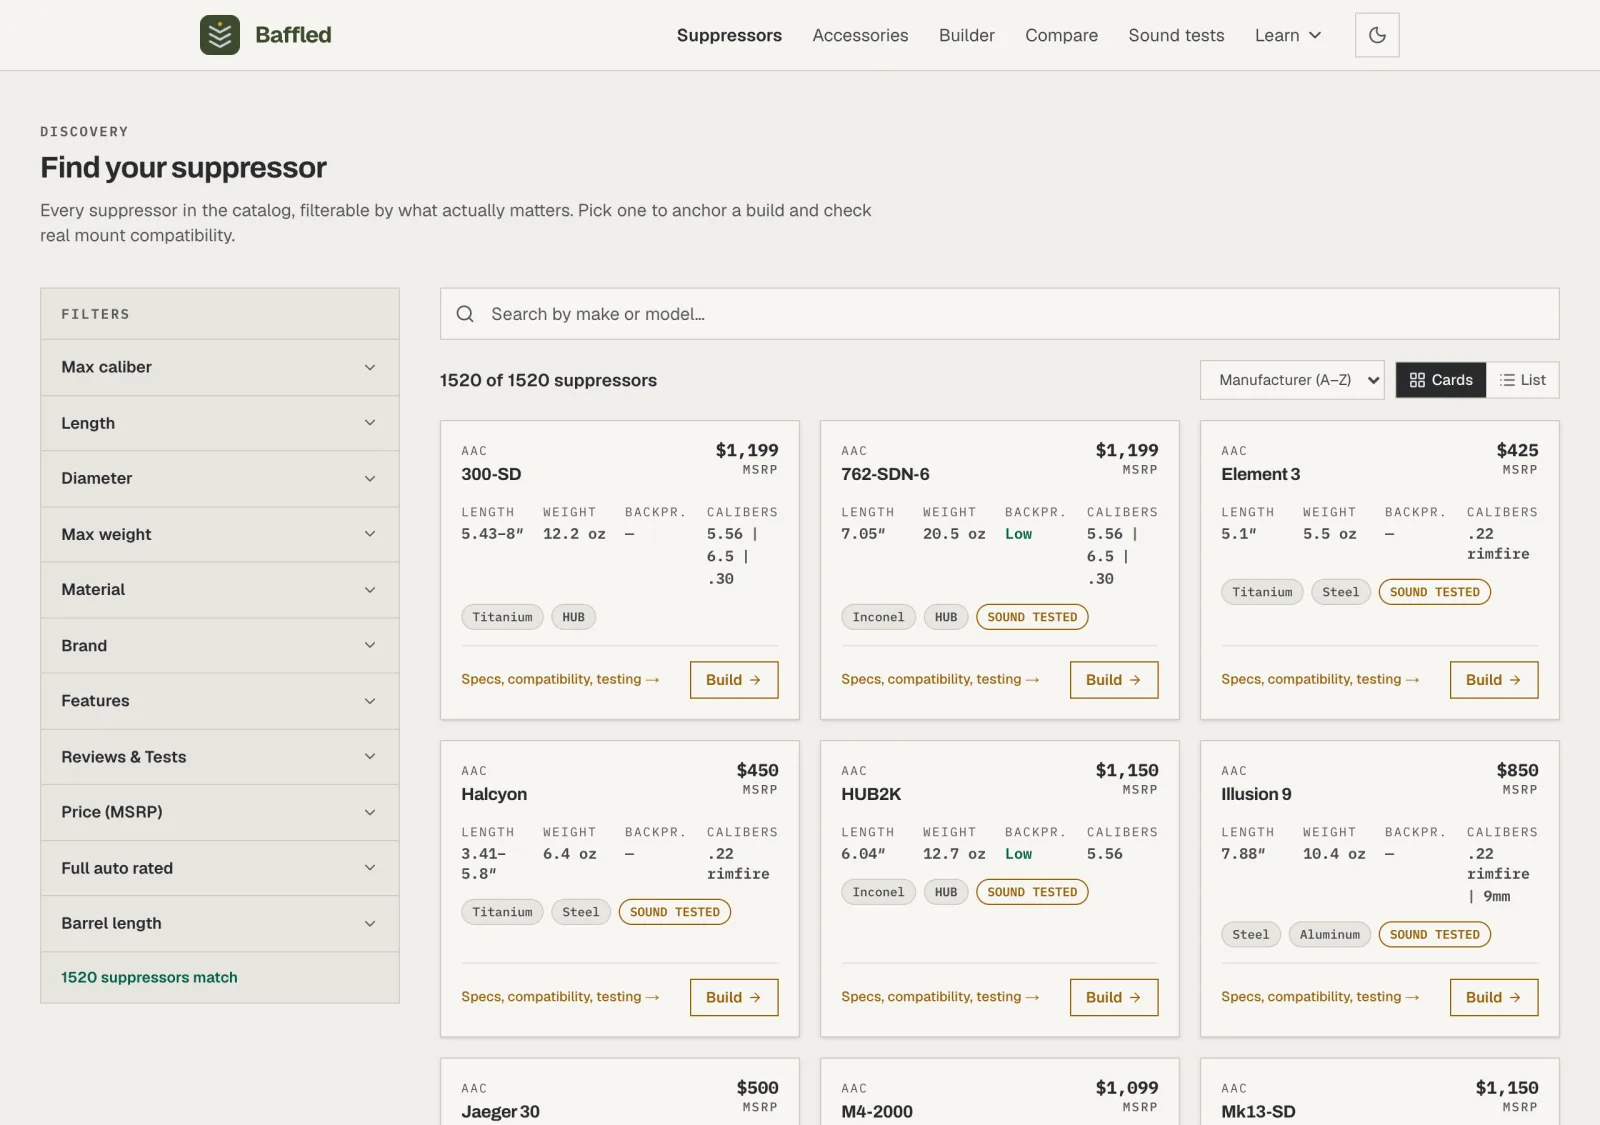
The catalog opens unfiltered. You don't need a model in mind to start. Step 2: Start with your caliber
Open Max caliber at the top of the rail and pick the caliber you're buying for. Choosing 9mm / .36 Cal narrows the grid instantly, dropping the count to the 9mm suppressors, and it updates the moment you click. Filters take effect immediately; on desktop there's no separate apply step.
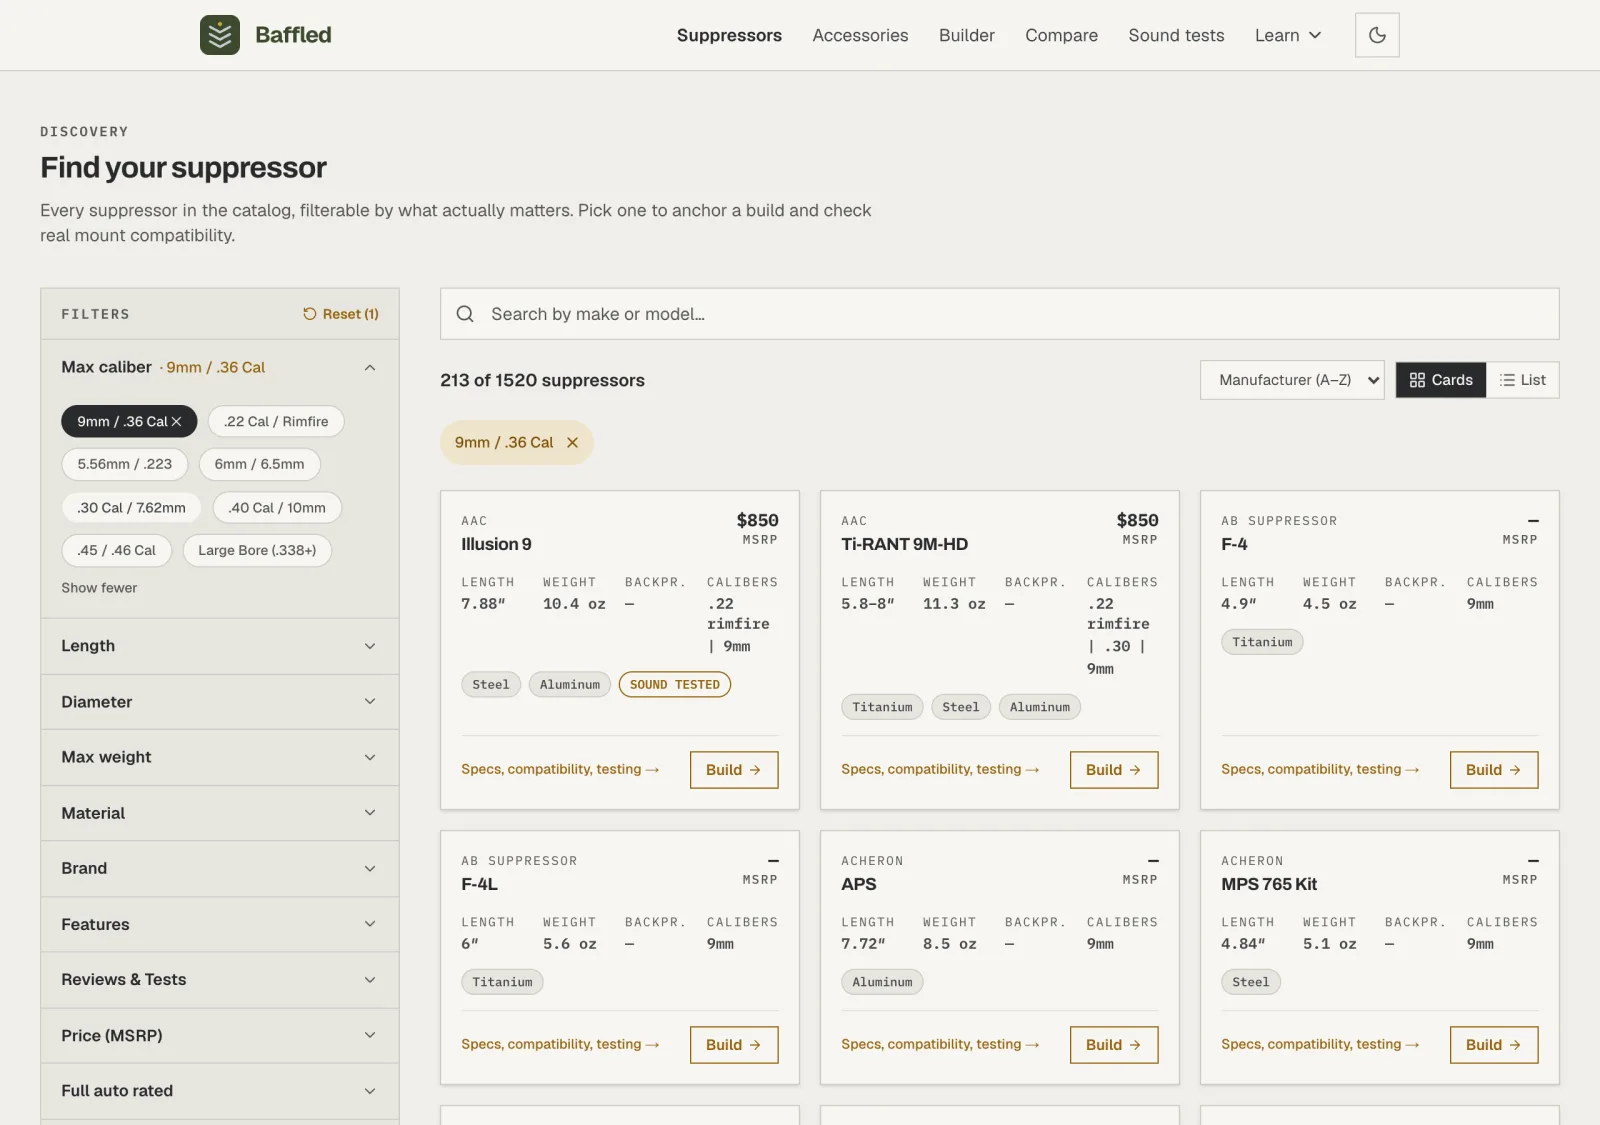
Tip: Caliber groups bundle related chamberings, so you don't have to match an exact cartridge to start filtering.
Step 3: Already know the model? Search for it
If you have a make or model in mind, the search box narrows the current results by name or brand alias. It works on top of your filters, so searching within 9mm surfaces just that maker's suppressors. Clear it to keep browsing the full 9mm set.
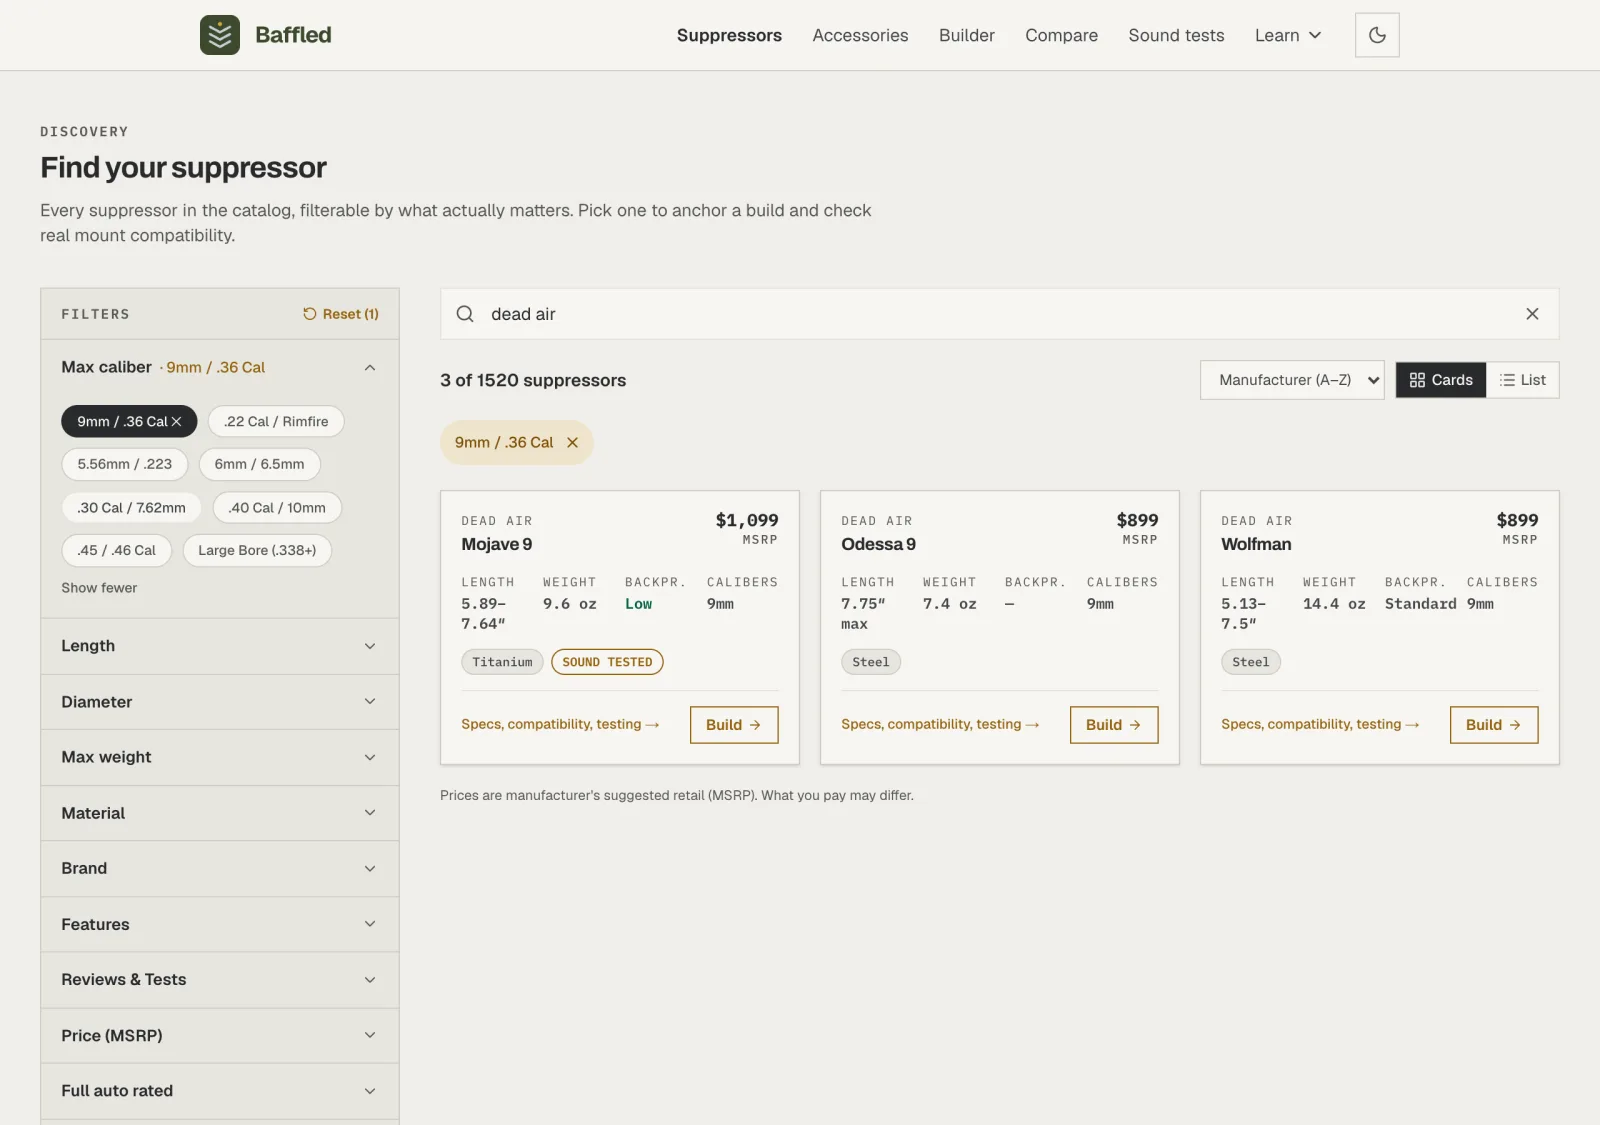
Search when you know what you want; filter when you're still deciding. Step 4: Every filter fits on one screen
The rail is a stack of collapsed rows: Max caliber, Length, Diameter, Max weight, Material, Brand, Features, Reviews & Tests, Price (MSRP), Full auto rated, and Barrel length. Open one and the others stay shut, so the whole list stays in view and the page keeps a single scroll. A closed row still shows what you've set on it, in amber, and the count at the foot of the rail says how many suppressors are left.
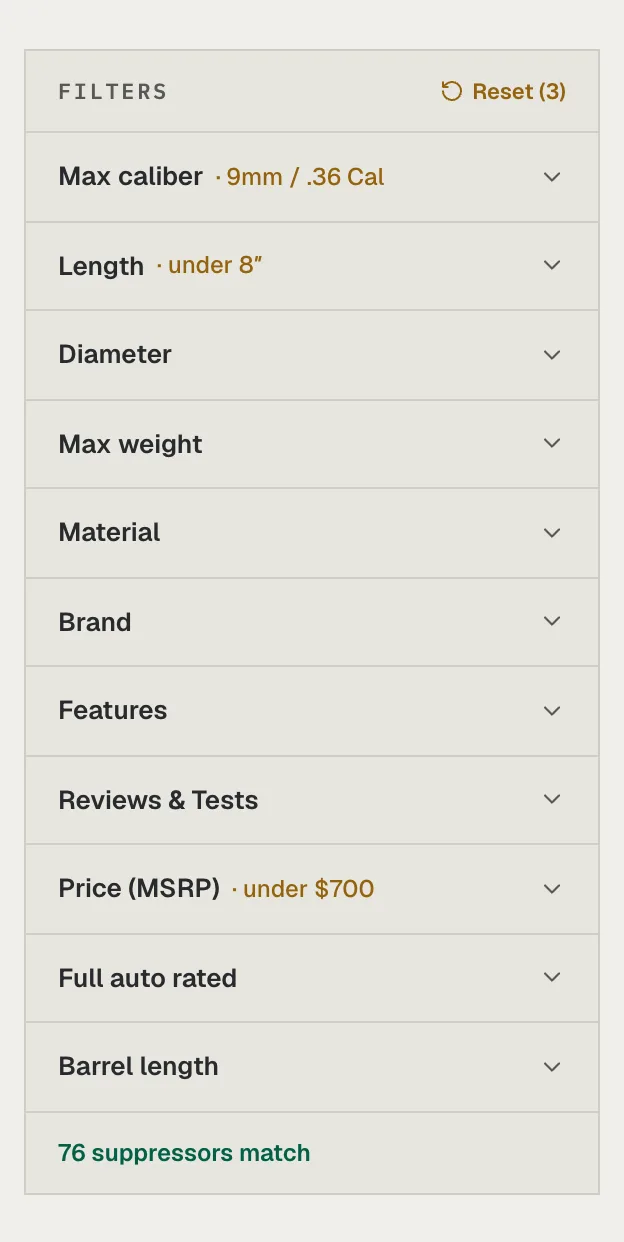
Nothing you've set is ever hidden: a closed row carries its own values. Step 5: On a phone, the filters live in a sheet
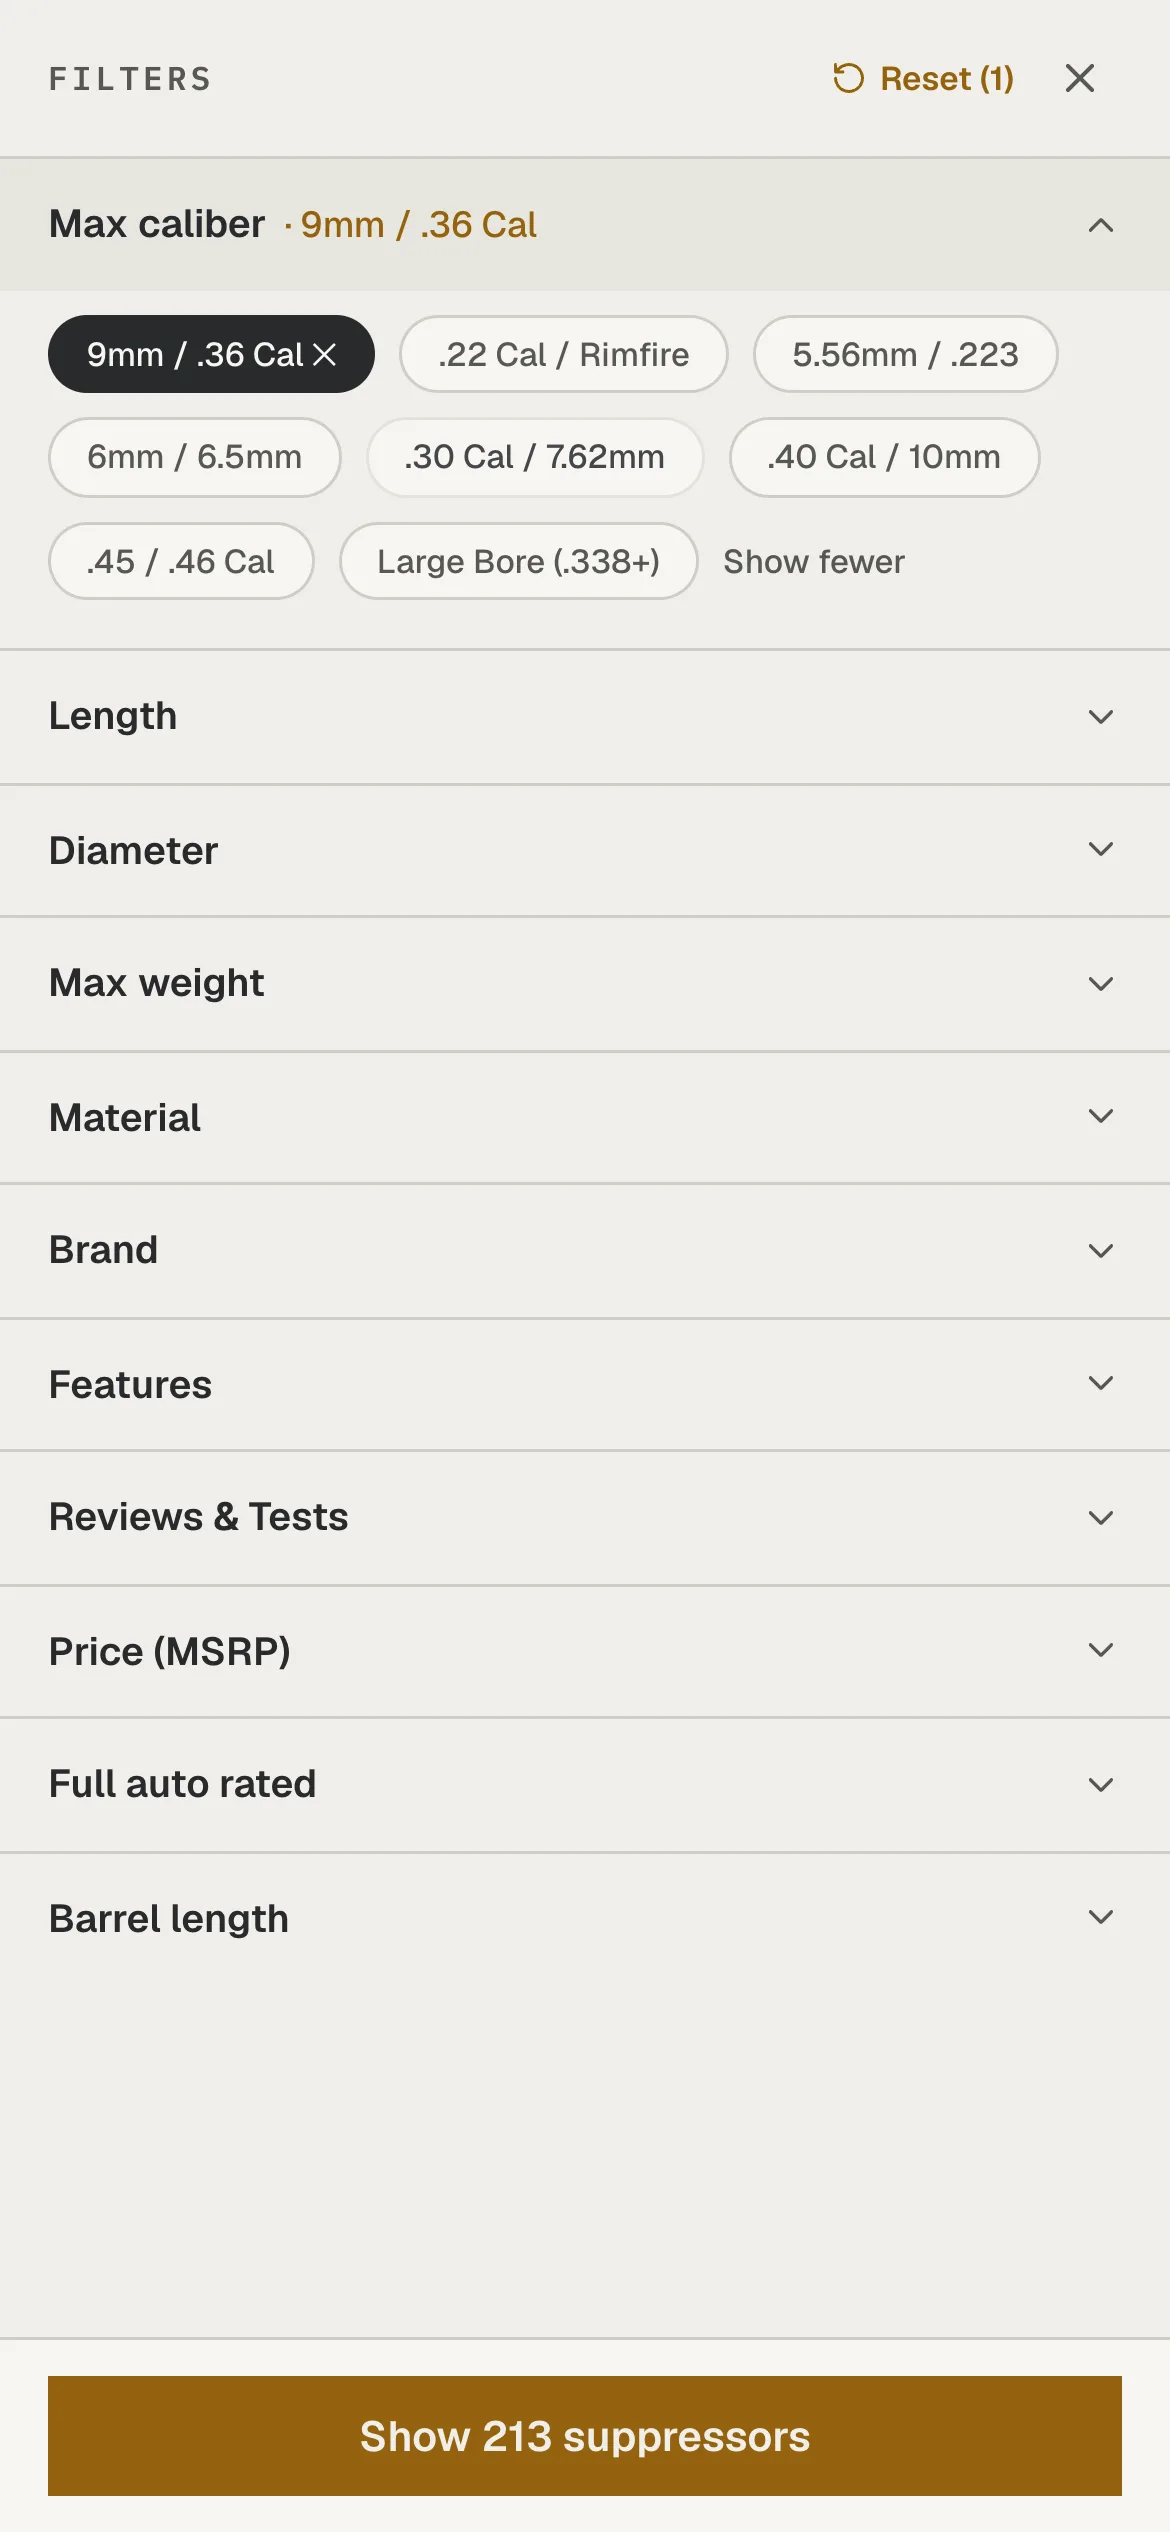
On narrow screens the rail collapses into a Filters button that opens a full-screen sheet with the same facets and a live match count. Set your criteria there, then tap the button at the bottom to apply them and go back to the results.
Step 6: Stack your real requirements
This is where compound filtering pays off. Add the shopper's hard limits: open Length and drag its top end down to 8 inches, then open Price (MSRP) and cap it at $700. Each filter is an AND, so the 9mm list keeps shrinking, and suppressors within budget pick up an Under budget marker.
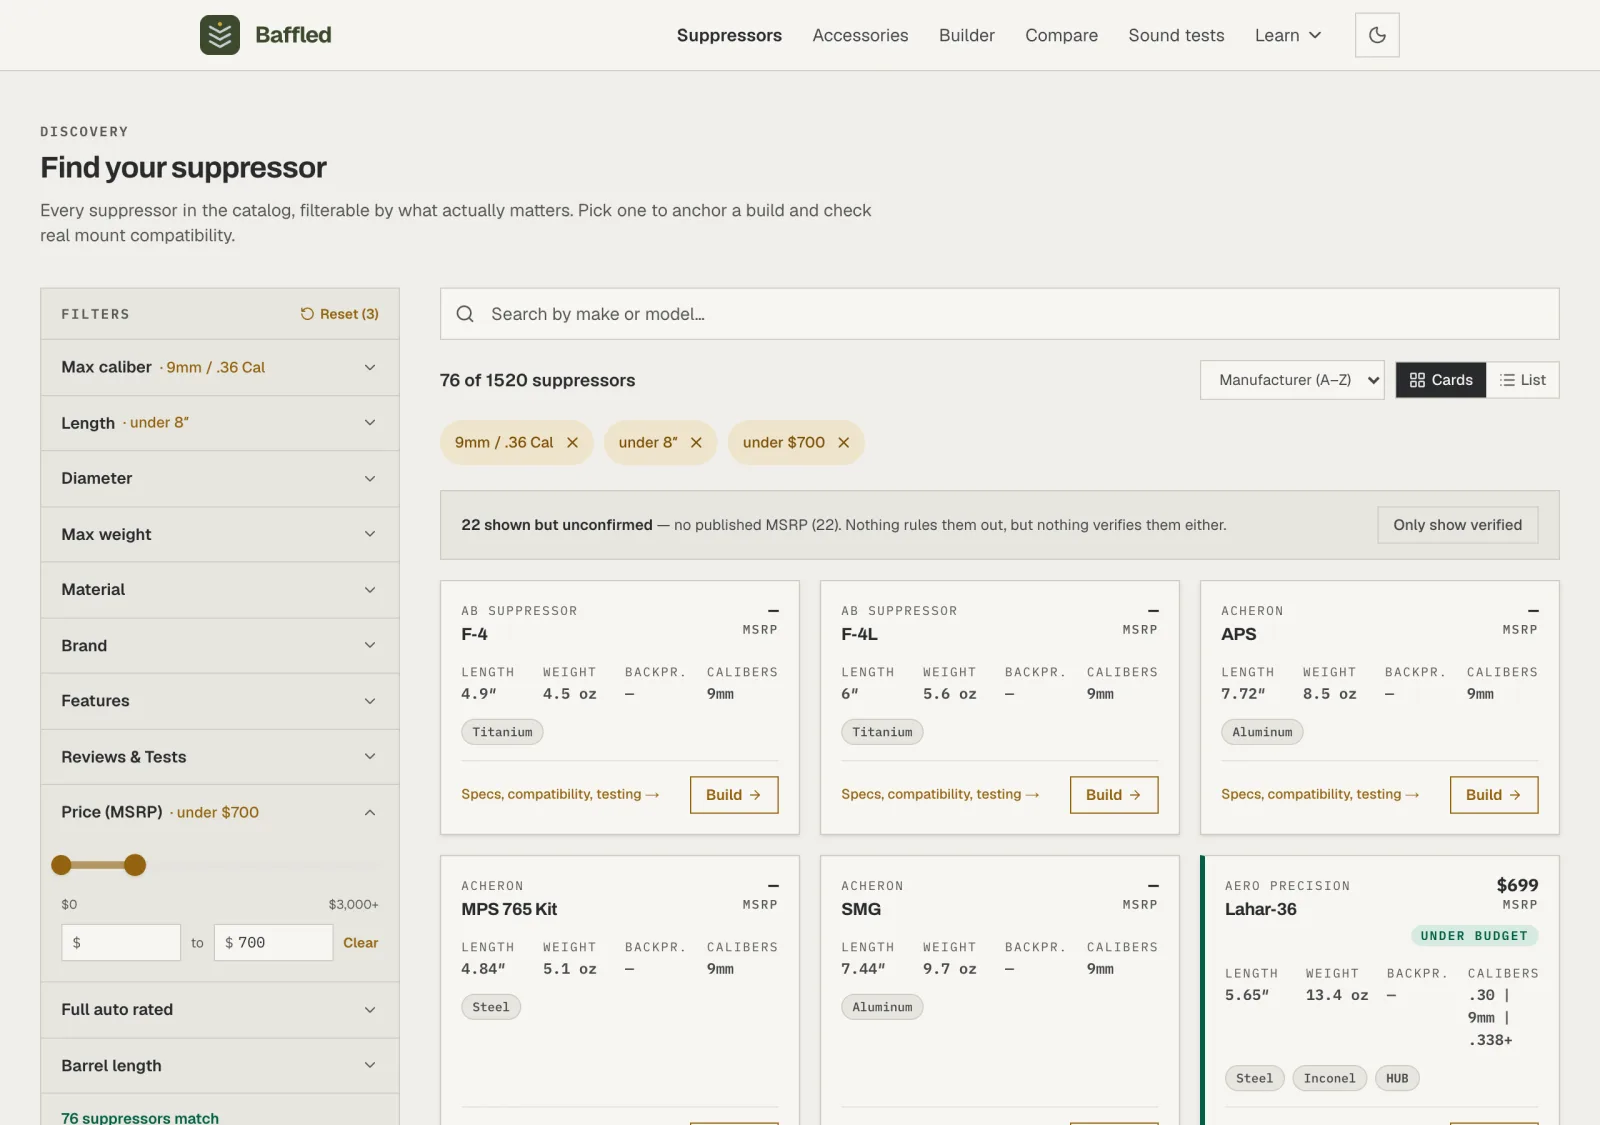
Stack freely: Filters combine in any order and none are permanent. Length and price are ranges, so you can set a floor as well as a ceiling; drag a thumb back to the end to clear it, type a number straight into the min or max box, or use the Clear link inside the row to drop that range on its own. Above the results, every value you've set has its own chip: tap the ✕ to remove just that one, or the label to jump back to the facet it came from.
Step 7: Sort the shortlist
Switch to the List view for the most sorting control: every column (Length, Weight, Backpressure, MSRP, and more) is a sort control. Click a header to sort by it, and click again to flip the direction. Here it's sorted by MSRP, cheapest first. The line above the table names the two destinations before you commit to a click: the row opens that suppressor's page, the Build button jumps into the Builder.
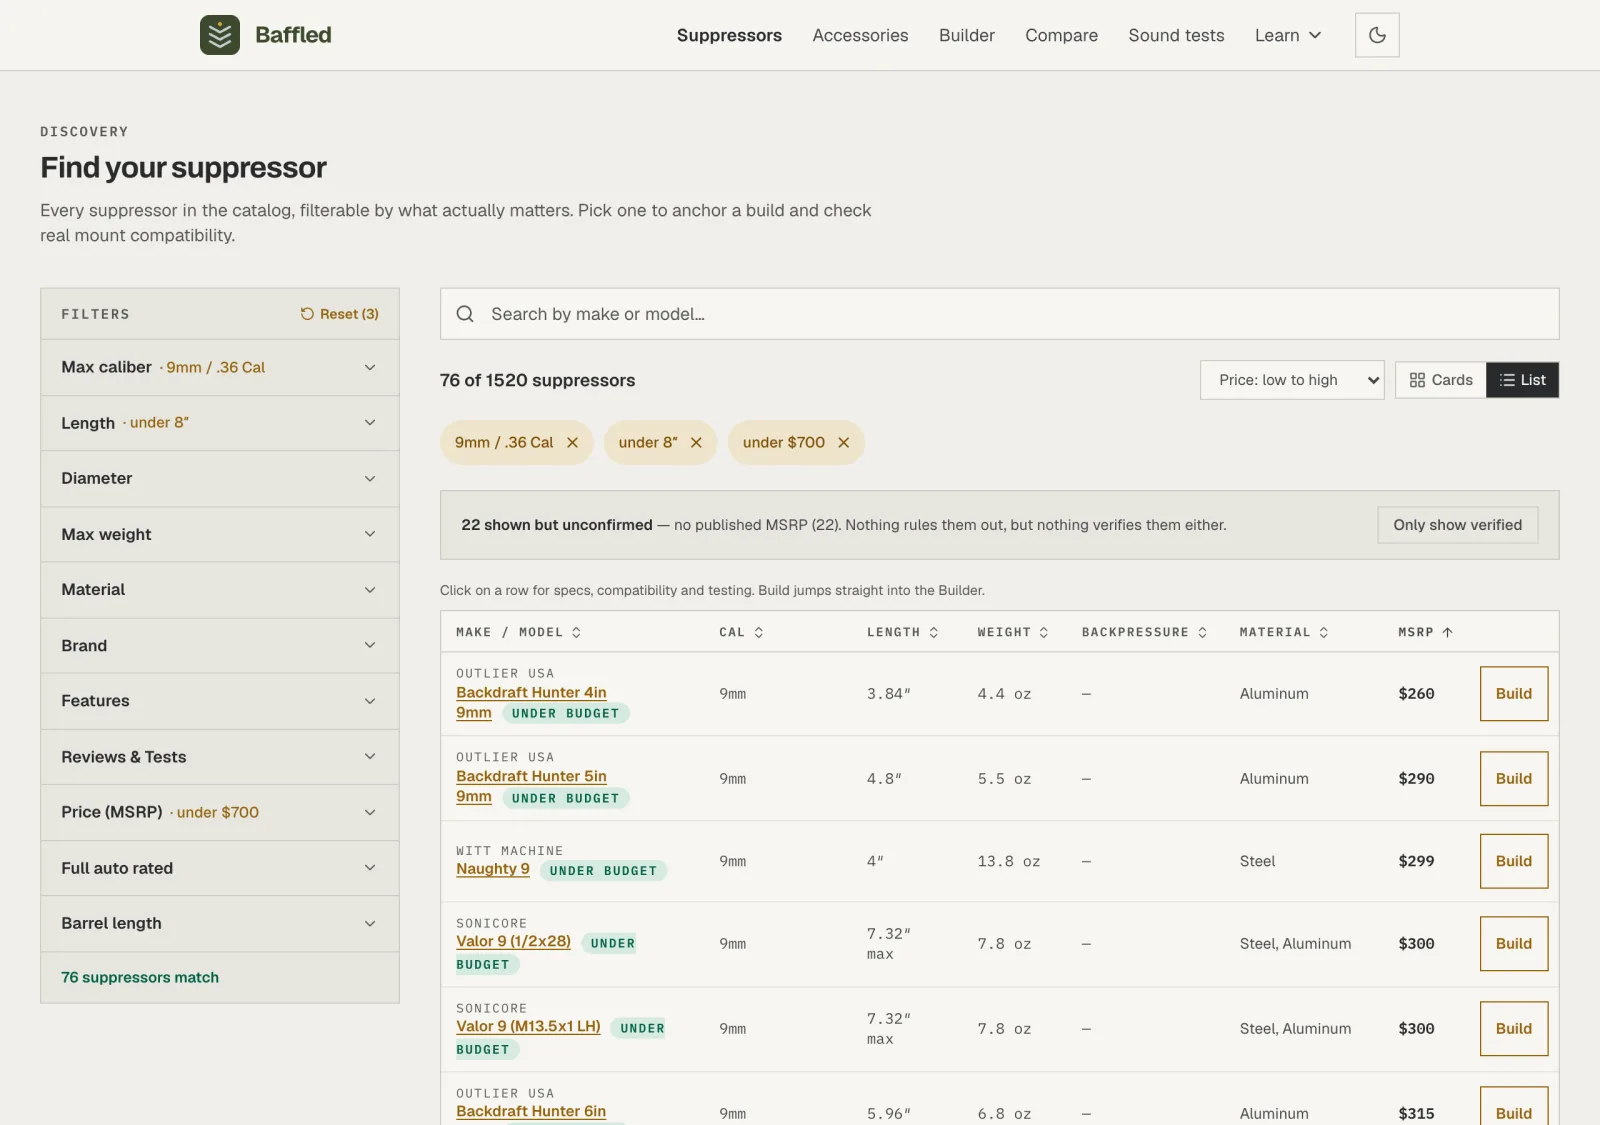
Cards view too: The Cards view keeps the common orders (shortest first, lightest first, by price) in a single dropdown when you don't need per-column control.
Step 8: Add your last must-have: measured sound results
The shopper wanted proven sound performance, so open Reviews & Tests. It holds two switches. TBAC Summit Tested keeps suppressors that were fired and measured at the Thunder Beast Silencer Summit, an annual test event that publishes its decibel readings, so every result has real measured numbers behind it. PEW Science Reviewed keeps suppressors with an in-depth independent review on file. Turn on TBAC Summit Tested and the list drops to a ten-suppressor shortlist.
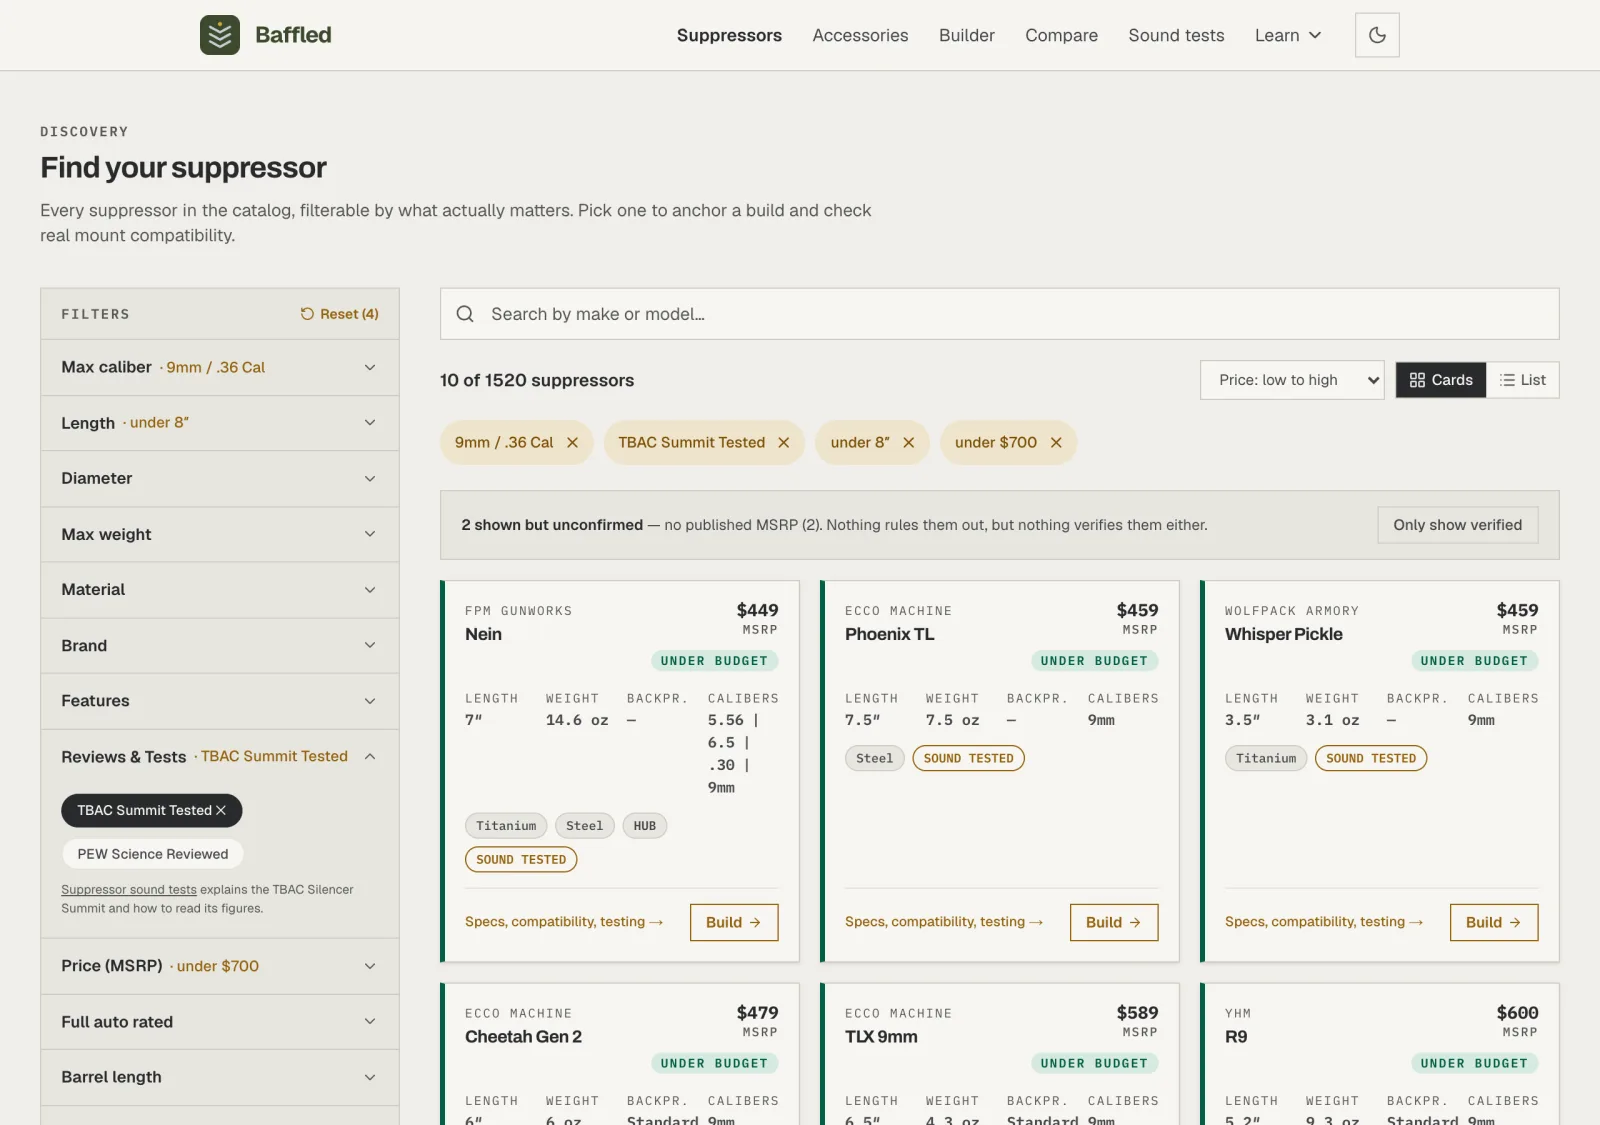
Every suppressor left has measured decibel readings on file. Two different signals: The Summit publishes measurements and no verdict. PEW Science publishes a full review with a rating. The switches stack like every other filter, so turning both on keeps only suppressors with both, and the Suppressor sound tests link under the switches explains how to read the Summit's figures.
Step 9: Inspect a finalist: two ways forward
Each card summarizes the specs that matter: length, weight, backpressure, caliber, materials, a HUB badge when applicable, and MSRP. From here the card has two destinations. Click the card itself to open that suppressor's own page, which is the full reference record. Click the Build button to skip straight into the Builder with the suppressor already selected. In the List view the whole row opens the page and the Build cell on the right opens the Builder.
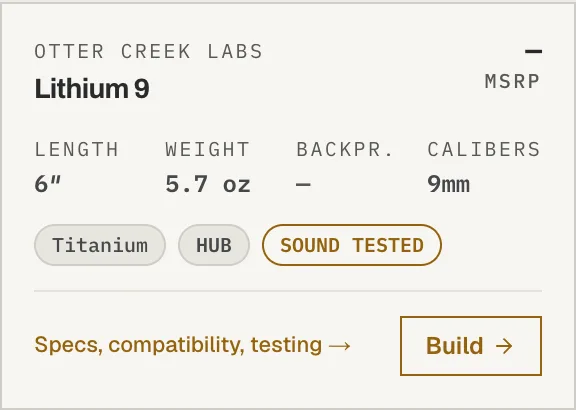
This finalist has no published MSRP, so it carries a dash instead of a price: a budget cap can't rule out a number the manufacturer never gave. On a phone: Phones drop the whole-card tap and give you two full-width buttons instead, Details and Build, so there's nothing to mis-tap. In the List view the spec columns swipe sideways between two pinned edges: the make and model on the left, the Build button on the right. However far you scroll, you can still see which suppressor a row is and still reach its Build button.
Step 10: Open the suppressor's page
Every suppressor in the catalog has its own page. It's a reference document, not a workspace: the full spec sheet, the mounting interface and what the ecosystem around it looks like, any measured sound tests and independent reviews on file, what the manufacturer claims, and the Sources card on the right listing every page those figures came from. Nothing here changes as you click, so it's the page to read before you commit to a system. Save to compare sends it to the compare tray, and Find compatible mounts & muzzle devices carries it into the Builder.
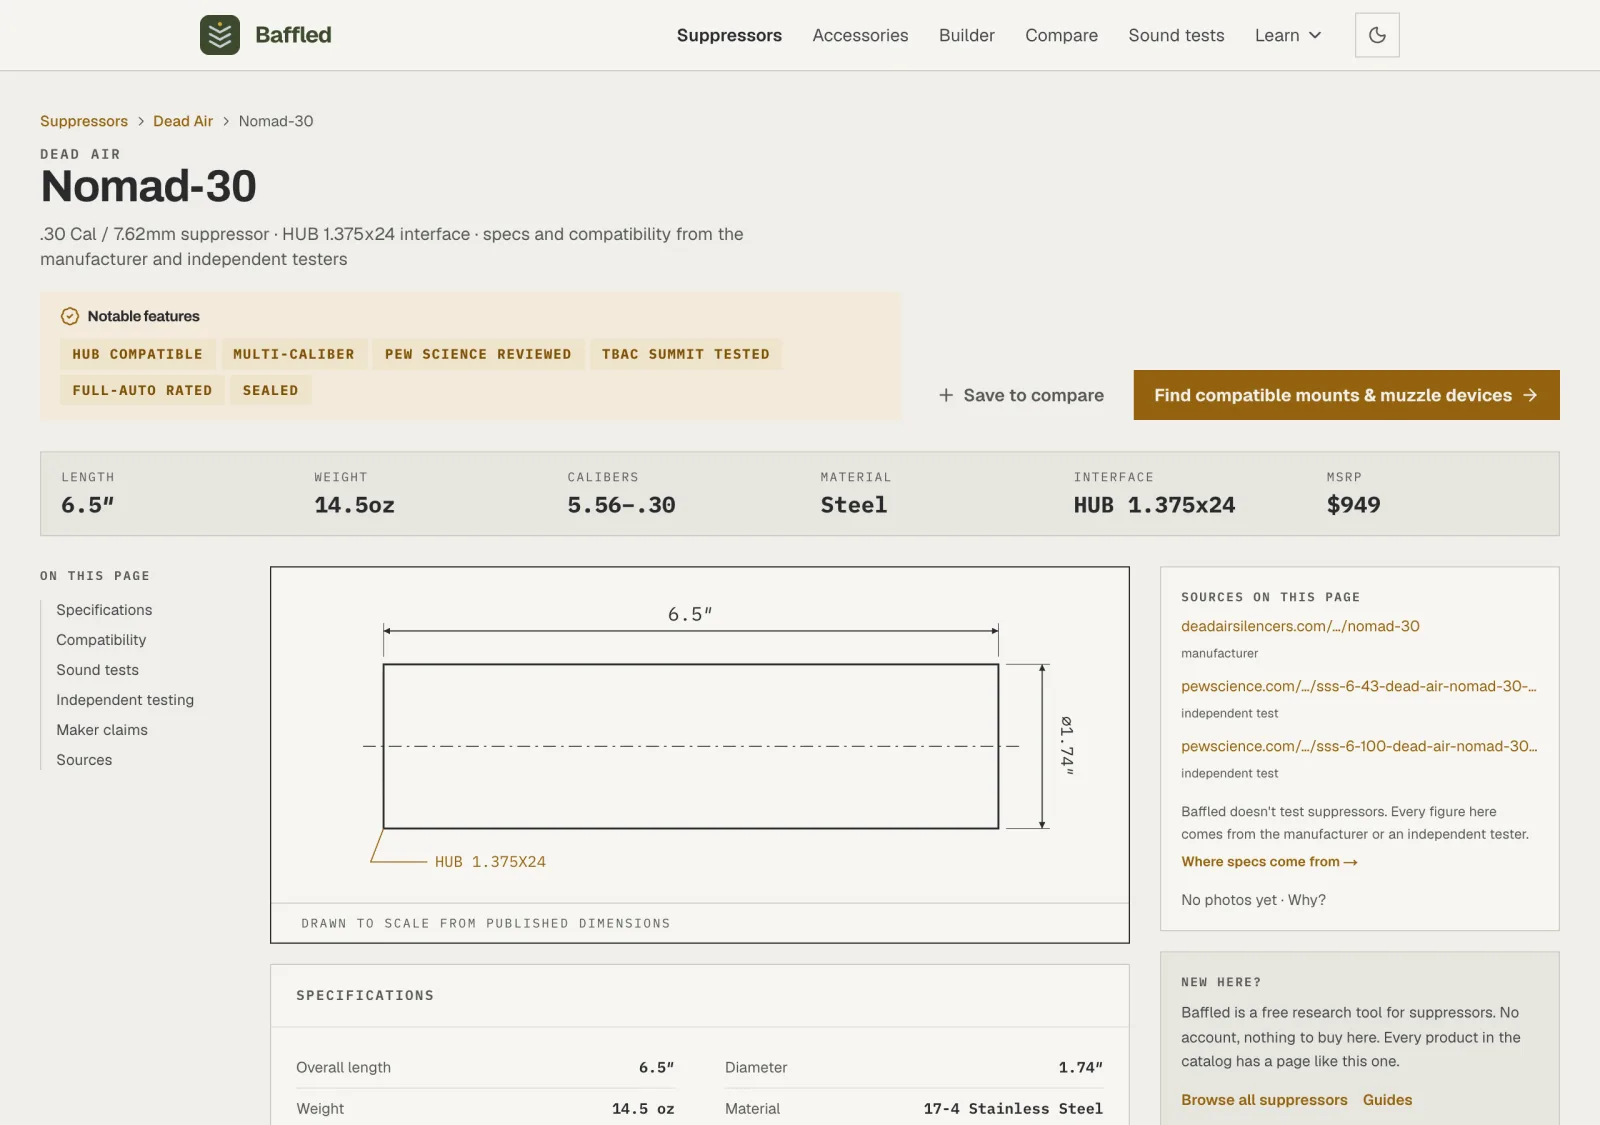
One page per suppressor, and the same records the Builder reads. Compatibility, not a parts list: The compatibility card doesn't name every part that fits. It gives you the shape of the ecosystem: how many mounts and muzzle devices in the catalog attach to this suppressor, a few examples, and whether they come from several manufacturers or only one. A list you can't check against your own barrel and host invites a decision it can't support, so the card hands that question to the Builder instead. Being locked to a single maker's mounting hardware is worth knowing before you buy, and the card says so plainly when that's the case.
Step 11: Reading a suppressor page
The band under the title is the headline: length, weight, caliber range, material, mount interface, and MSRP. A cell that isn't there means the manufacturer never published that number, so nothing is guessed to fill the gap. When a retailer also carries that suppressor, which is still uncommon, the headline adds its price and a Shop button, labeled with the retailer's name (OpticsPlanet, EuroOptic, or Guns.com) and the date the price was read; the affiliate disclosure covers what that link does and doesn't change. Further down, the sections are sorted by who is speaking. Sound tests holds decibel readings measured at the Thunder Beast Silencer Summit, with a link to every test the suppressor appeared in. Independent testing lists third-party reviews. What the maker says is the manufacturer's own description. Each section links out to where it came from, and Show all opens the rest of the record.
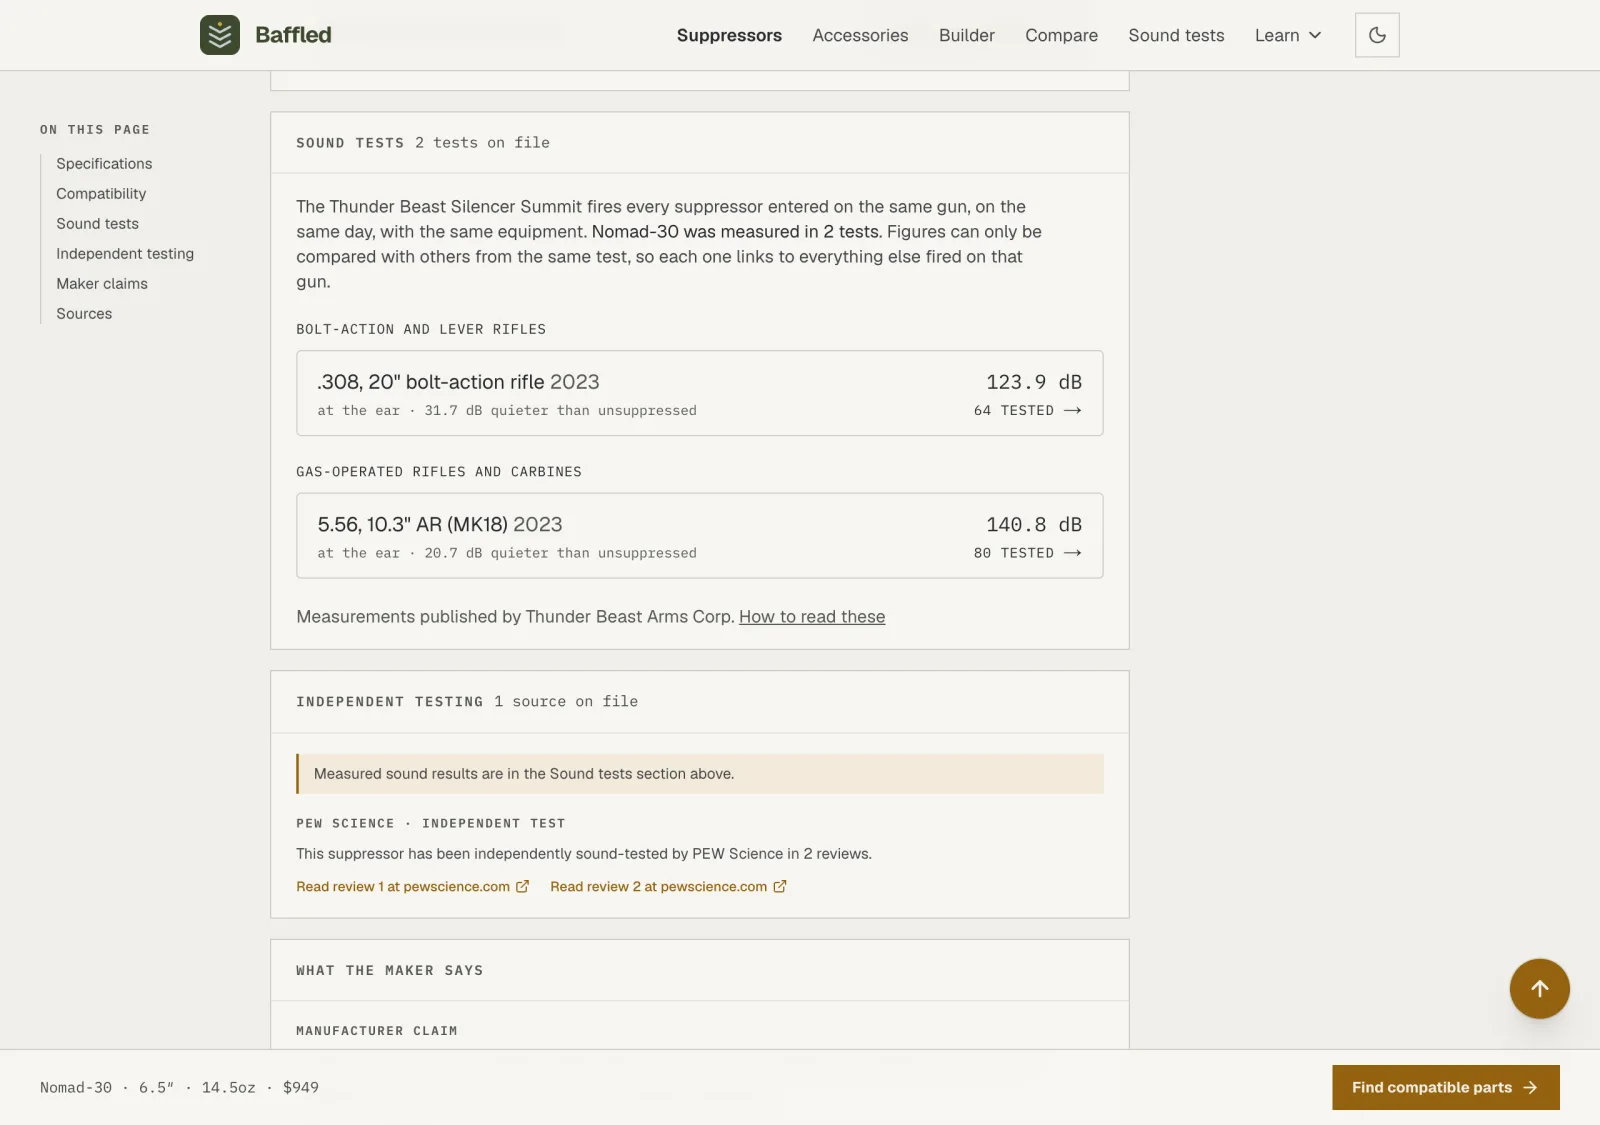
Why some pages are shorter: Sections only appear when there's data behind them, so a suppressor with no independent testing on file simply has no testing section. Photos appear only where the manufacturer gave us permission to show them, which is why many pages have none. The FAQ covers both: see Why don't all products have photos?